HOME TOUR

Hi sweet friends. Welcome to this month’s blog hop, an Easter addition. Easter is early this year which I always dread a bit because Easter feels like an outside holiday and here in New England, the outside just needs a little bit more time to “wake up” from its winter slumber. If you’re joining me from Know How She Does It and Gloribell’s lovely home, welcome. I’m so happy you’re here visiting me.


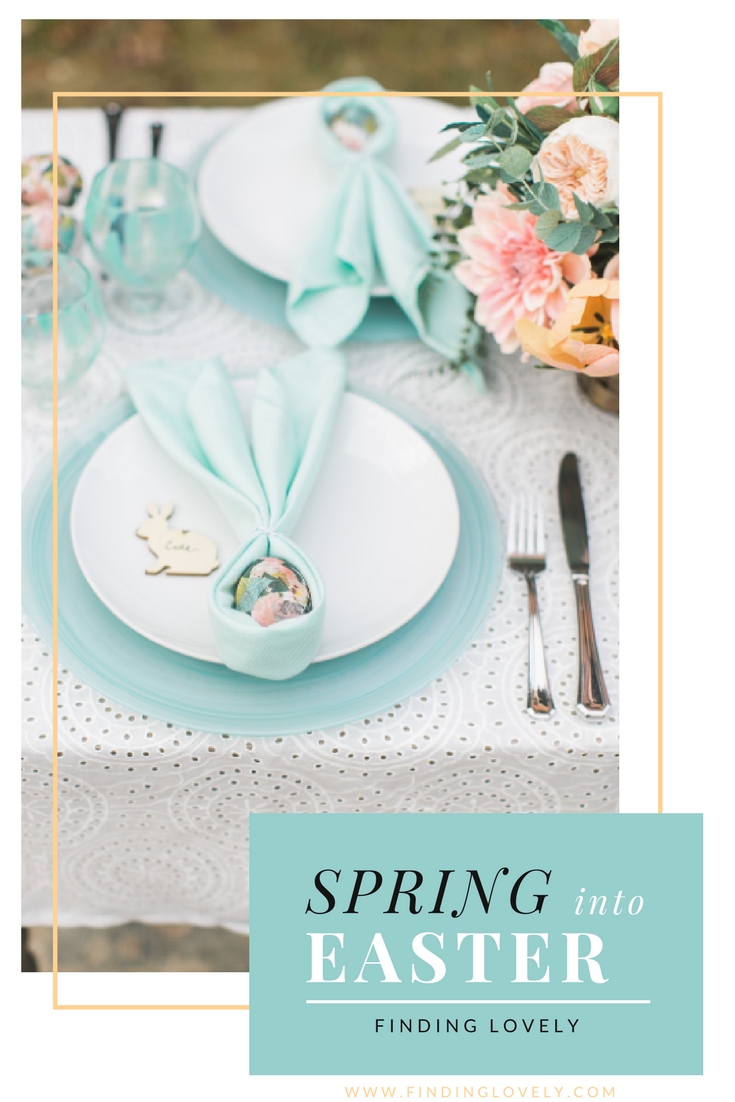
We’re currently in month 4 of our renovation/addition on our old home. You can see the progress here. And after 3 weeks away in California visiting Nana and Poppie there was just no way I was sprucing up our home in time for some Easter home inspiration. Easter feels like it’s best done outside anyways celebrating the happy spring so I set up the kiddo’s play table on the lawn outside on top of a vintage rug sourced from Etsy. This one is slated for the master bedroom closet but for right now, it’s serving double duty. And a nice rug makes outside picnics a bit more fun.

I didn’t have kid-sized chairs for the table so I found these awesome crates at Target that are so sturdy they can easily serve as stools. Plus they’re a great grey-brown color.


I ended up buying fabric to make the linens for the table. Which always sounds like a good idea until I remember my loathing for the sewing machine. I found the aqua cotton fabric in the clearance section at JoAnns. I wanted the napkins to be regular dinner size, 20″ x 20″ so I got 1 1/4 yards, cut it into 4 sections and hemmed the edges. Let me rephrase that…my husband came to the rescue and I showed my husband where I wanted him to hem the edges. I want to chuck sewing machines out the window and my sweet hubby is weirdly patient. The table cloth is 1 3/4 yard of a pretty white eyelet fabric. I had initially bought it with the thought I would make a runner but I put the fabric over the table “just to see” and I loved the look of it as a pseudo-tablecloth.

I used this article from Martha Stewart to fold the napkins around my eggs. It’s a simple fold that you wrap around your Easter egg and tie with twine, I used baking twine in a similar color to the napkin. It sure makes for a fun table for the little kiddos and could not be easier. The napkin bunnies are sitting on top of a gorgeous aqua swirl glass charger from Crate and Barrel.


For me the highlight of this pretty table, besides the gorgeous pictures my friend Ruthie took, is the beautiful paper flower arrangement made by my sweet friend Christine of Christine Paper Design. Last year I was honored to have Christine make flower garlands for my mom’s birthday party in Napa. You can see them in action here. Can you believe they are made out of paper!?! Oh my gosh she is so talented. The amount of work she puts into the details is what makes them so special and I love that I can use these for years to come and I plan too! At the end of this month you’ll be able to enter a giveaway for a chance to win your own little arrangement so stay tuned. That’s one spring giveaway you are not going to want to miss.


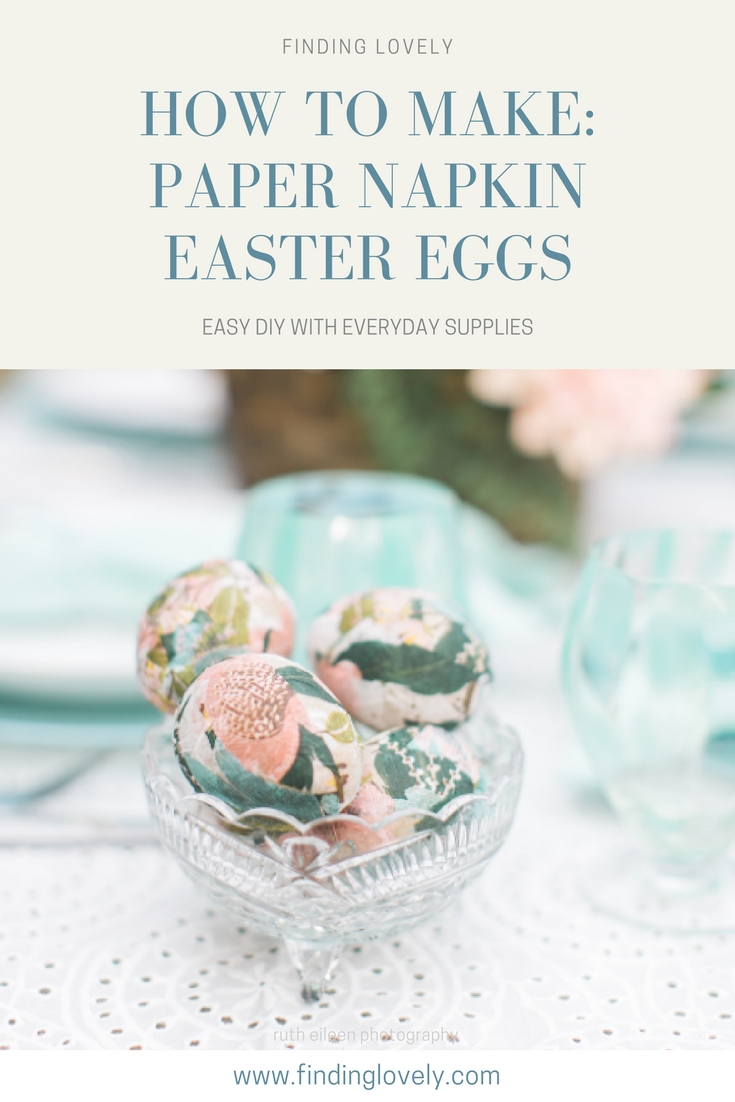
So here’s the fun part! Napkin eggs! An easy DIY and unique way to decorate eggs for Easter. I’ve been doing these since I was little and they couldn’t be easier. Less work then decoupage and with basic, everyday supplies. And what a cute Easter craft for kiddos to help with. All you really need are eggs–either real (blown eggs so they are hollow and won’t go bad) or faux eggs (these ones were paper mache from JoAnns), paper napkins, elmers glue and scissors.

DIY NAPKIN EGGS
- Paper Napkins (I usually look for pretty floral patterns)
- Scissors
- Elmer’s Glue
- Faux Easter Eggs or blown real eggs (I used brown paper mache eggs)

Start by separating the napkin layers. The pretty napkins are usually 2 or 3 ply meaning there’s a white layer(s) on the inside that peels apart from the pretty printed part. This makes the napkin thicker for mealtime use. You don’t have to separate them but when you cut them into pieces and go to glue them on the egg, sometimes they separate and it’s a bit annoying.
Cut the napkin into irregular shapes of different sizes. I don’t usually go bigger than 1.5″ just so they aren’t too big to put on the egg.
Add a bit of glue to egg and put a napkin piece on.
Add more glue to the top of the napkin piece and rub it around completely covering it. This secures all of the edges to the egg and is essentially decoupage except you don’t have to buy any special glue or special sealer and I use my finger. I use just regular white Elmer’s glue and it works fine. Repeat this step, slightly overlapping napkin pieces until you’re halfway done.
I put the unfinished part of the egg down on a plate to let it dry. This makes it easier to hold and finish. Once dry, repeat the glue and napkin placement until the rest of the egg is done. I continue to overlap pieces slightly so there’s a varied look to the finished egg.


I hope you enjoyed our Easter table inspiration this year. Perfect for kiddos or grown-ups alike. Continue on the Easter Inspiration Blog Hop by heading on over to Ashley of Modern Glam‘s Home. So much more lovely to come in her pretty home!


These beautiful pictures were captured by my oh-so-talented friend, Ruthie of Ruth Eileen Photography. She’s so very talented at taking the sweetest pictures. If you’re in the New England area and looking for an amazing photographer, she’s your lady!

Disclosure: This post contains affiliate links with Amazon and Reward Style, which means I may receive a commission if you click a link and purchase something that I have recommended. These are all products I would put in my home or have used to make a project and I am happy to inspire your home decor, crafting and party planning. Clicking any links on Finding Lovely will not cost you any extra money but it does help me keep this site up and running smoothly with limited ads!


18 responses to “A Homemade Easter”
Leave a Reply


 Back To Home Tour
[…] you are here from my dear friend Jackie, Finding Lovely, welcome! I’m so glad you stopped by! Jackie has the most beautiful style and her Easter […]
[…] Jackie | Finding Lovely […]
Ok, let me pick my jaw up off the floor long enough to comment because WOW! Could you be cuter?! I think not. I love this so much. What a beautiful and perfect Easter table! You have the luckiest kids ever! Gorgeous color and I’m totally making those napkin eggs pronto! Just adorable, my friend! xoxo
Summer this is just the sweetest comment! Thank you!
This is so adorable Jackie! Love all the DIYs in this post. So many great ideas. And those paper flowers, oh my! Everything here is amazing!
Jackie your outdoor table is charming!! Can’t even begin to think of outdoor setup here in Vancouver yet ☺️ I can’t believe your flowers are made of paper! Love all of your sweet Easter details!
[…] Jackie | Finding Lovely […]
[…] Jackie | Finding Lovely […]
Jackie,
You always have the best crafts and decor. I thoroughly love reading your post and you are so lucky to have Ruth as your photographer. All her photos are stunning and I aspire to take photos like hers! Thanks so much for joining us this month and I just adore your post!
Thank you so much Janine! Ruthie does do an amazing job, I’m so thankful. 🙂
Wow!! its all so beautiful and love this egg DIY, I’m going to try it. Thank you
[…] Jackie | Finding Lovely […]
Jackie this is a fabulous Easter blog, so many ideas for me to try! Especially the bunny ears napkin! So cute! I love all your beautiful touches making your Easter table so special.
Love, love, love the napkin egg decorating tutorial! And this Easter table is adorable… love going outside!
Holy moly this tablescape is BEAUTIFUL! The flowers and colors are stunning and your DIY eggs are adorable!
Well done!!
XO
Lacey & Kim
Jackie, this is all so gorgeous!! I love all the details you incorporated into your kids’ table but my favorite part is those eggs!! I totally want to make something similar!! Thank you for sharing!! Love them so much!
Awww thank you Yuni! That’s so sweet of you to say. 🙂
[…] Jackie | Finding Lovely […]