
HOME TOUR
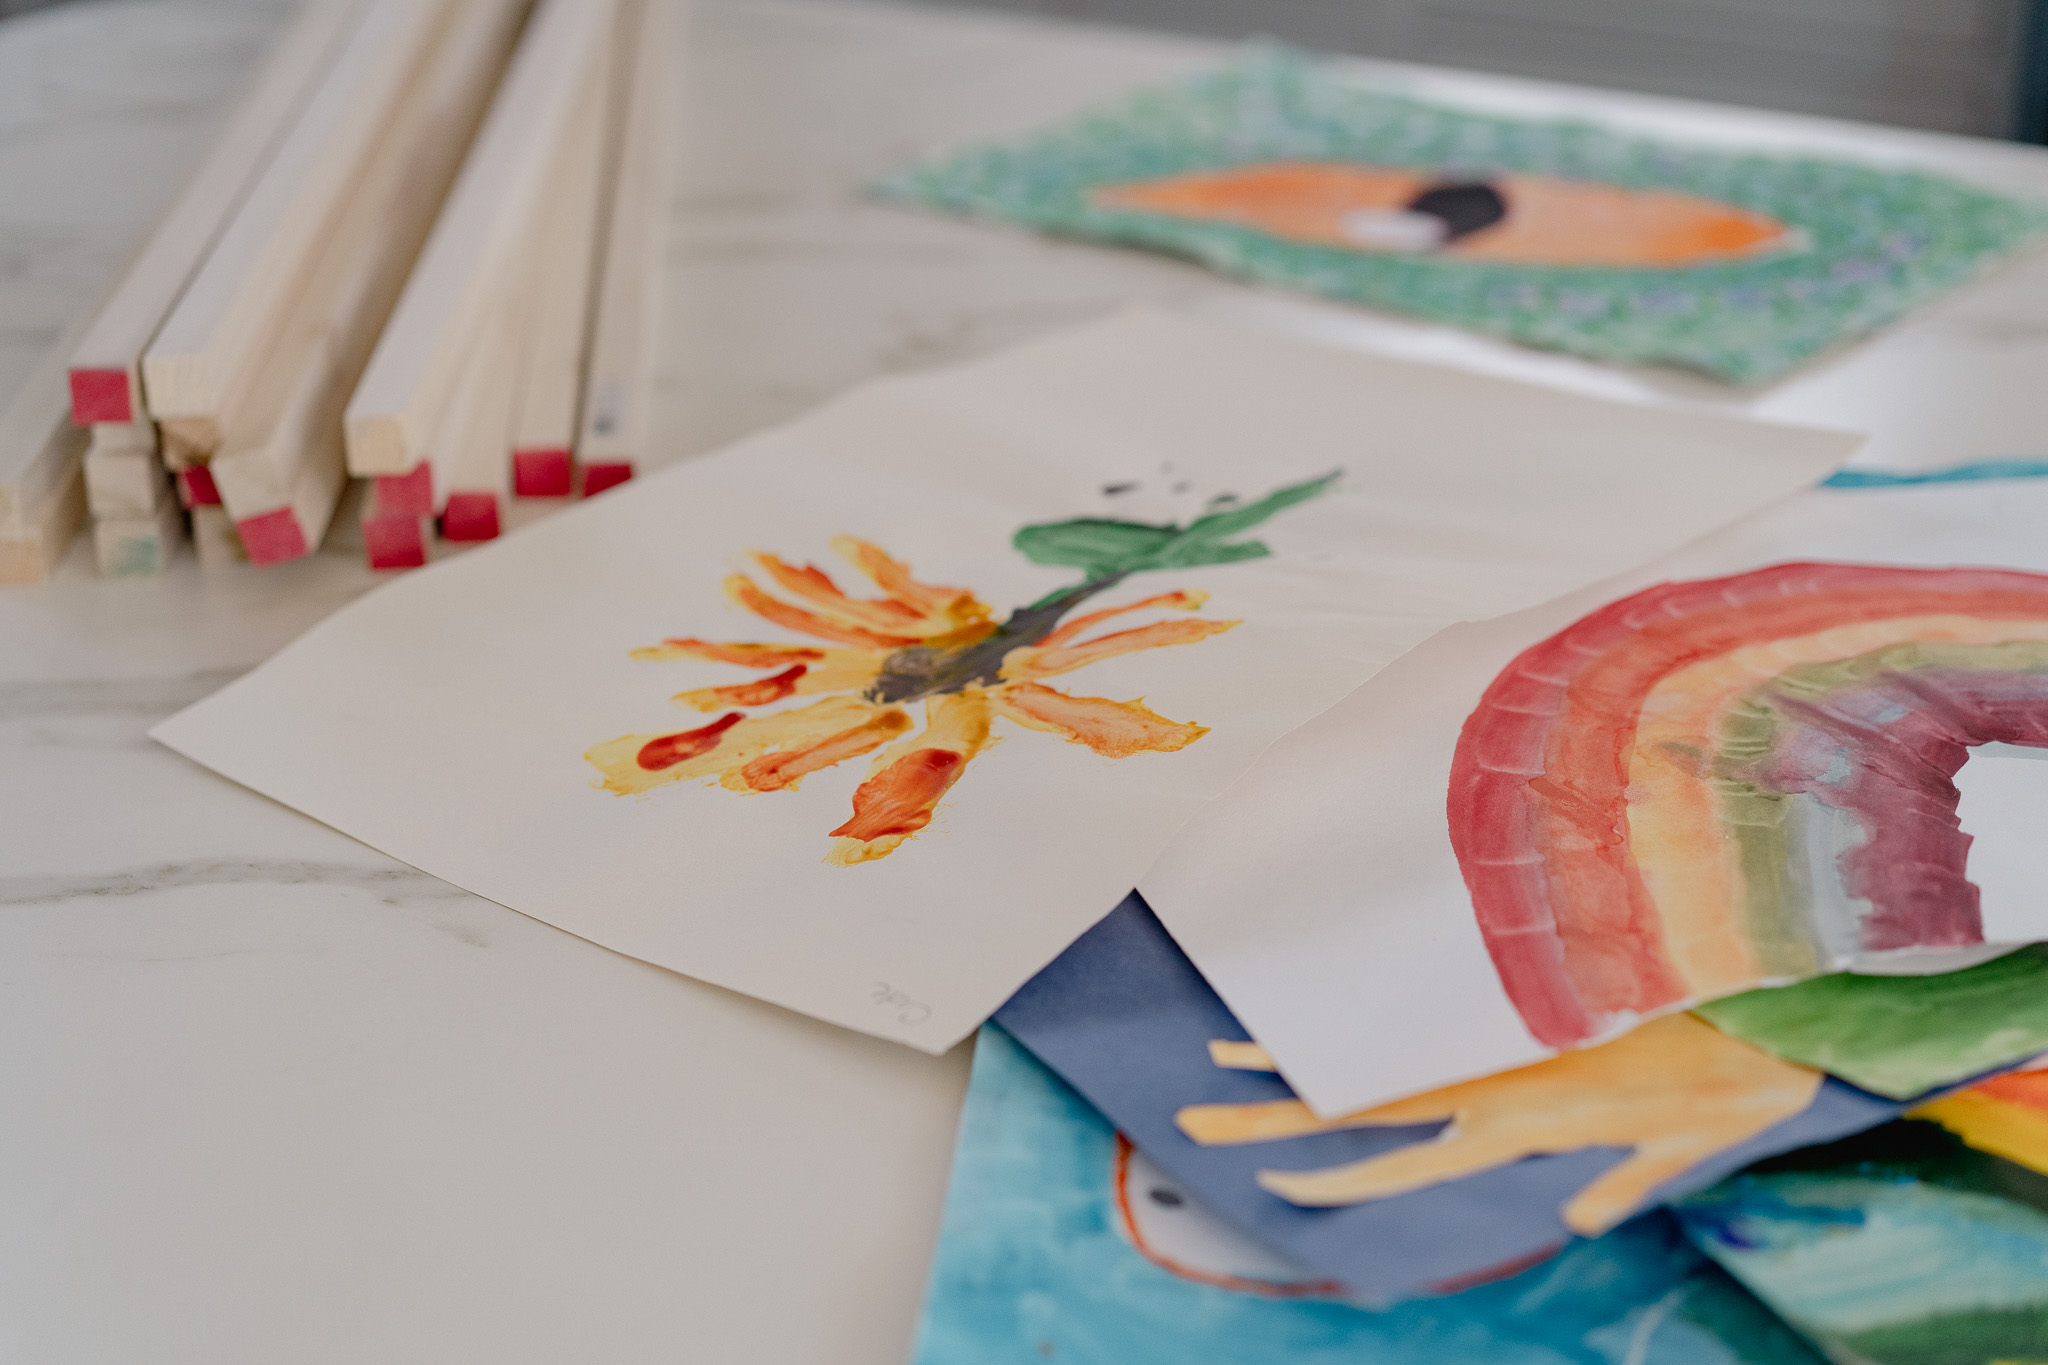
Well friends, you all wanted a post ASAP on these DIY Bobbin Frames so here it is! I just finished hanging them up yesterday. The playroom walls have seen many iterations over the years, from sweet alphabet cards when they were small to most recently, displays of the kid’s beautiful art. But taped up, I was finding them either on the floor when gravity did its thing or sloppy and crooked from balls being thrown. I started the process of looking for custom frames with an Etsy shop I fell in love with. But given the size and the number I needed, the price tag was astronomical so I dragged my feet. As fate would have it, that Etsy shop closed forcing my hand to come up with a homemade version. These DIY Bobbin Frames check all the boxes: they were easy to make, inexpensive and totally customizable. And now, the kid’s art looks intentional and polished!

DIY BOBBIN FRAMES
I am well aware that this is not an original idea. I took inspiration from quite a few blogs as I formed my plan of attack (I found this one especially helpful because she shows the finished frames with different size wooden beads). You can find premade ($$$) versions online (Bertola Studio from the UK and plenty on Etsy). I loved the idea of premade but given we made 11 frames and the average size was 13 x 19″, it would have been well over $1000.00 for custom frames. Our total, when all was said and done was roughly ~$165 total for the wood trim and beads (we had the wood glue and used leftover paint). Almost all of the DIY options I found were done using premade frames but this was exactly the problem! Our kid’s art is abnormal sizes (mostly between the standard A1 and A3 sizing you see online) and wouldn’t fit in anything “standard”. I didn’t want to trim down their work so I got to work! I found 3/4″ wood trim pieces at Home Depot, linked here, to make the picture frames. 20 mm wooden beads fit perfectly on 3/4″ wide wood.
A NOTE ABOUT THE WOOD TRIM
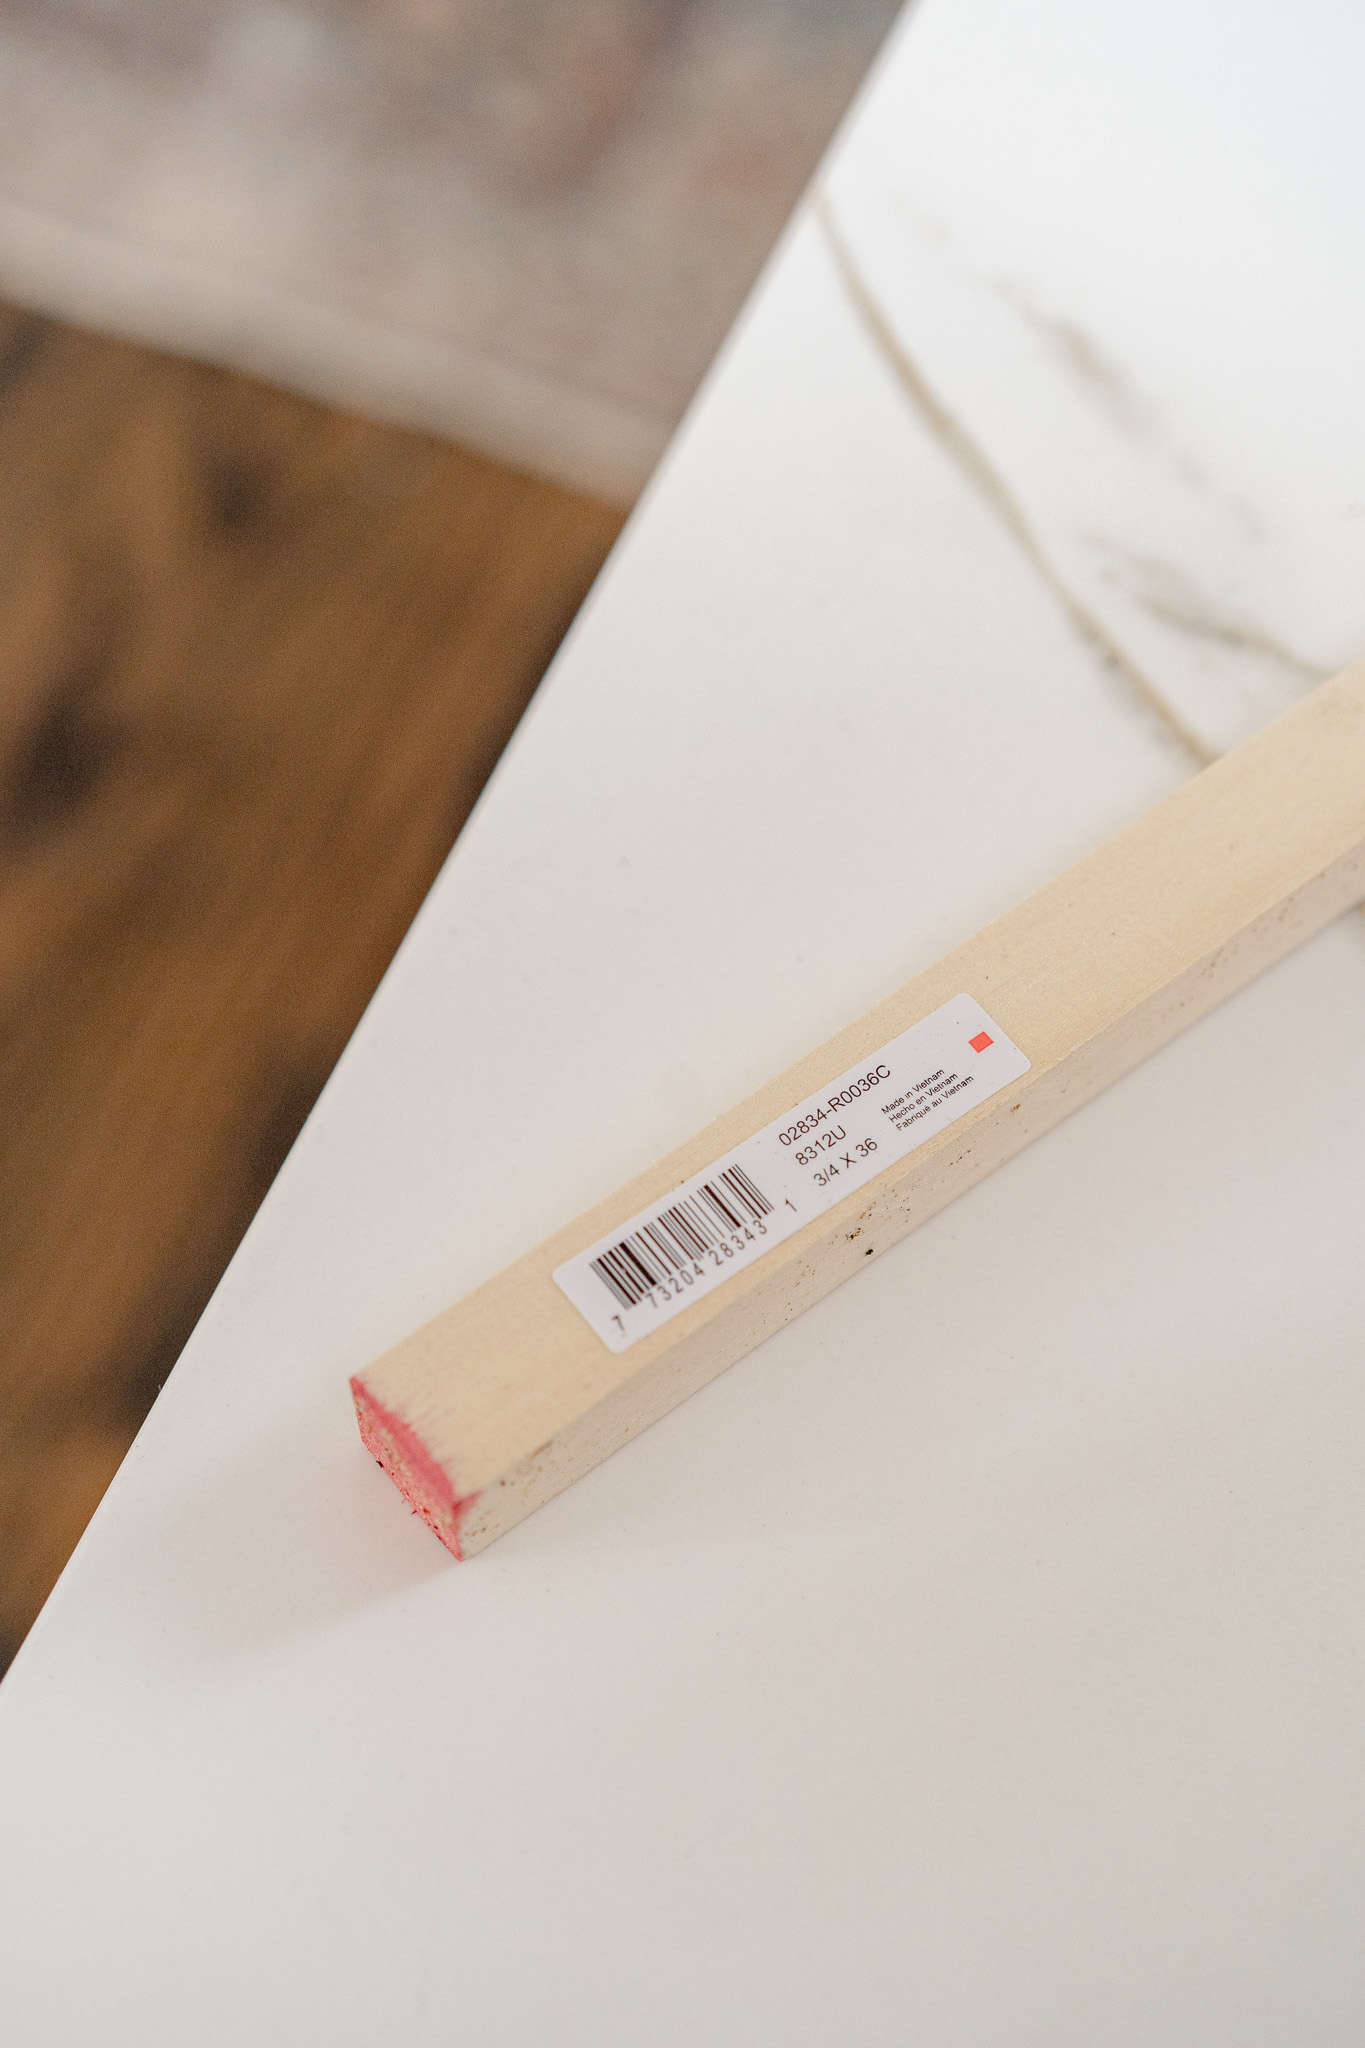
Our Home Depot had the 3/4″ trim in 36″ length pieces in the trim and moulding aisle. We bought 20 pieces and used 19 of the 20 to make 11 mostly-large frames. The largest frame we made, with the Koi fish picture, is 20″ x 26″. You can buy the 3/4″ trim online and have it delivered but it comes in a length of 96″ and they have a minimum order of 3 pieces. We would have saved $45 if we had ordered these online and had them shipped. My impatience cost us here. I haven’t measured exactly but I swear they’re also the same size as the cheap wooden stakes in the garden center which could have been another cost-effective option.
SUPPLIES
20 mm Half Wood Beads (In total we used just shy of 1000 beads for our 11 frames, you need more than you think)
3/4″ Wood trim pieces (we got ours at Home Depot, linked here)
Nail Gun (Matt wanted to be extra sure they’d stay together but you could probably get away with just wood glue if you don’t have this on hand)
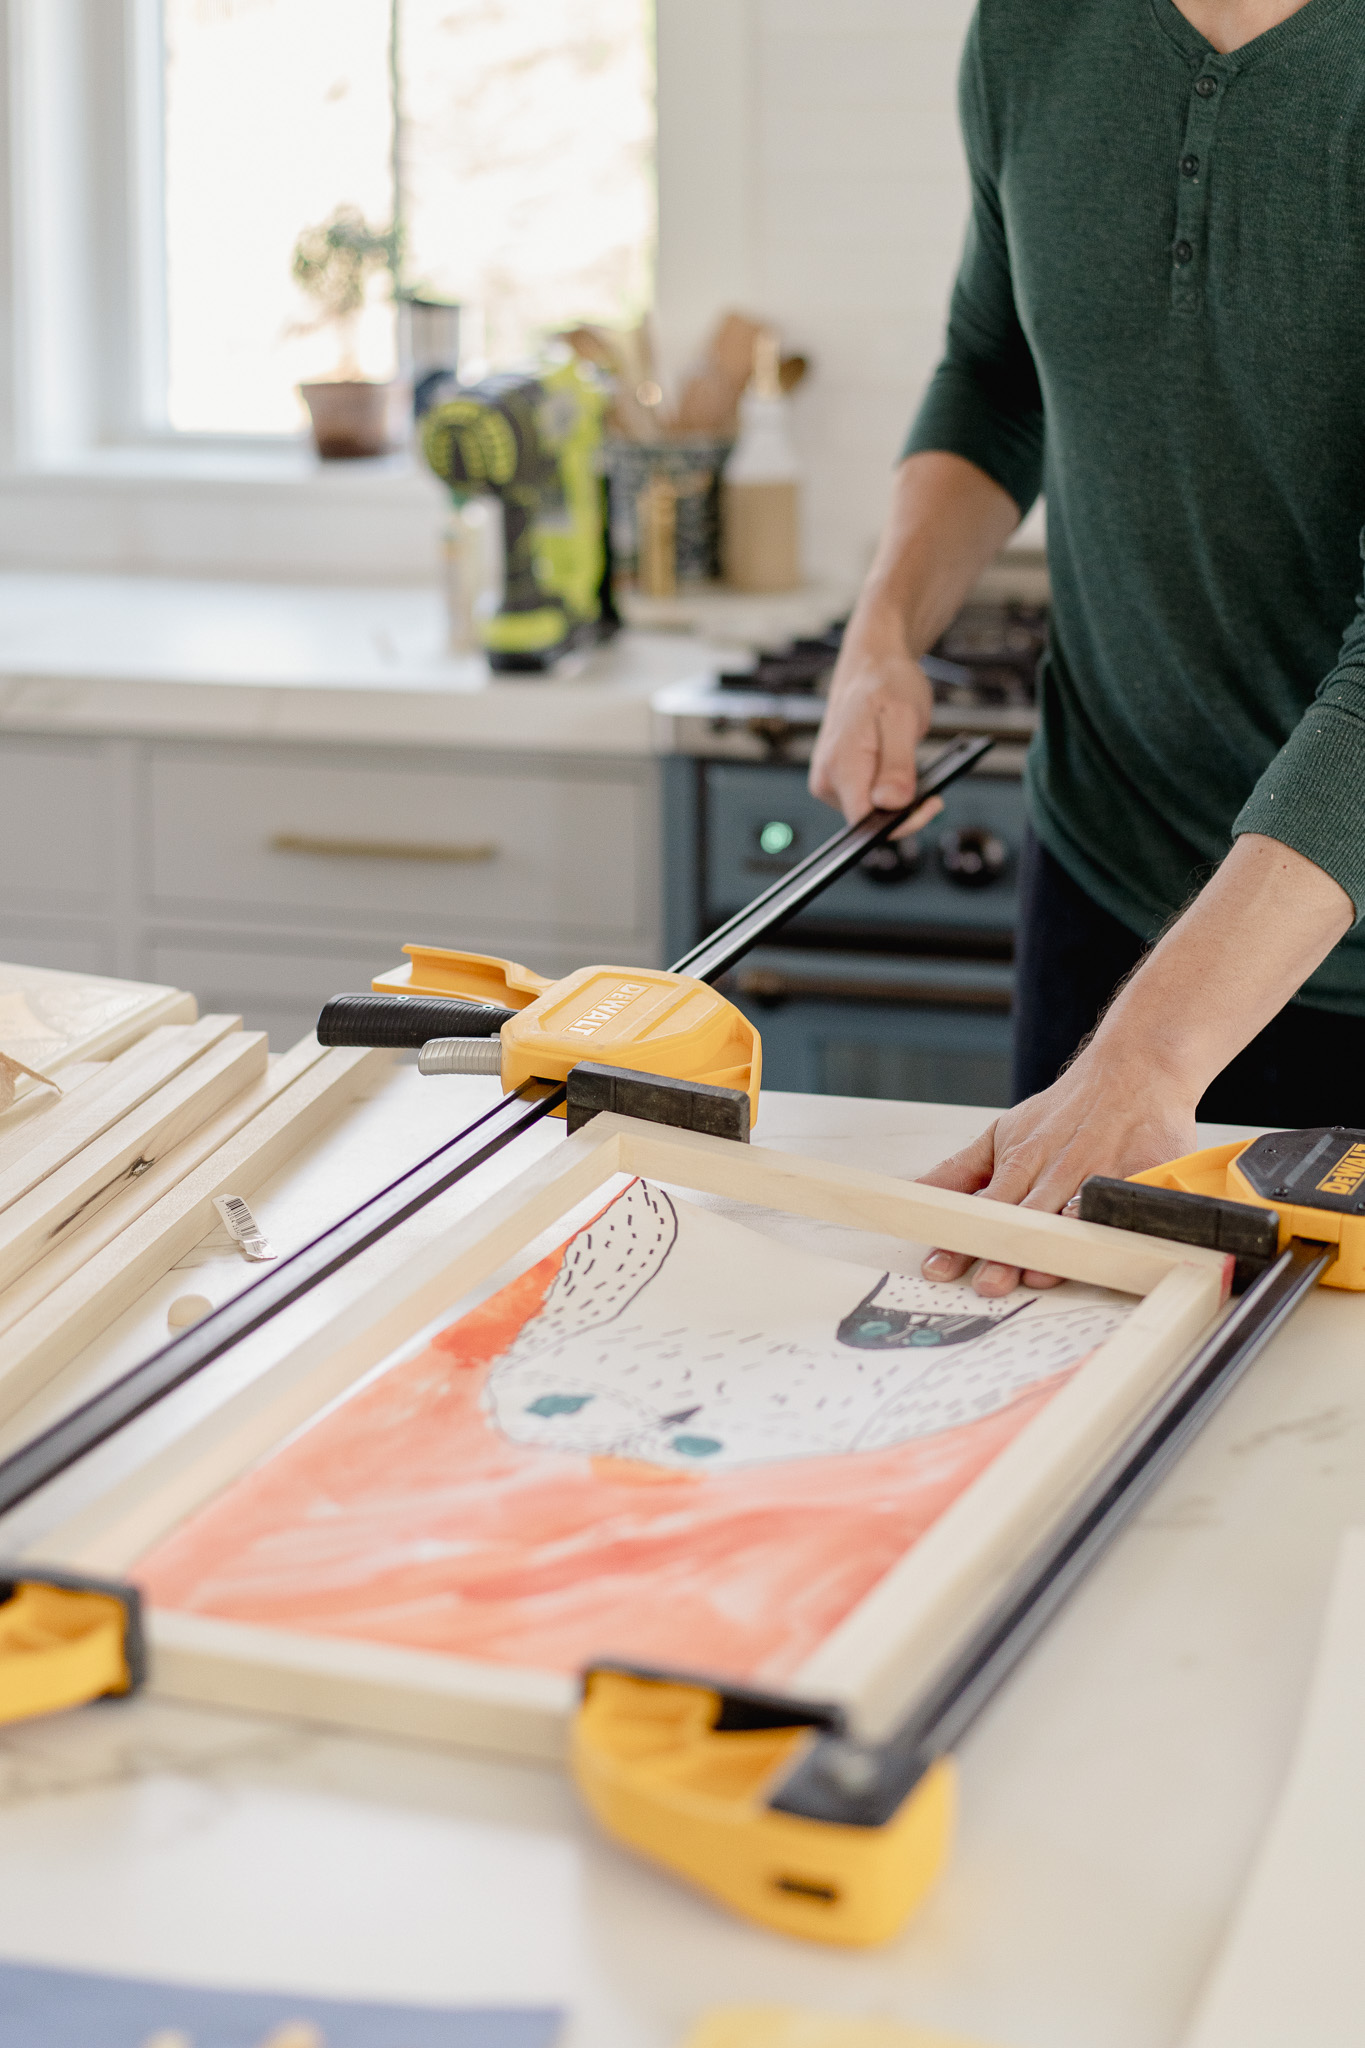
Expandable Clamps (Matt uses these for so many things, if you’re looking for a good Father’s Day gift this is it! They kept the frames in place while the glue dried)
Command Stripes (for handing on your wall, I used 4 per picture because I want the easy of removal when/if I change this grouping out)
INSTRUCTIONS
Start by measuring and figuring out what size(s) you need which will give you an idea of how much wood to buy. If you have standard size art, it saves you a step to buy premade frames. If you need custom sizes or large frames, this DIY is the perfect option. We did not use glass for these frames, specifically because they are going in the playroom and Kai has already put a bouncy ball through one of the windows. You could always buy plexiglass but I didn’t want to spend more money and they look fine without.
We made the frames almost the same size as the art, only covering about 1/4″ on each side. this left just enough space to tape the art on the back specifically so we wouldn’t cover up a large part of the art with the frame.
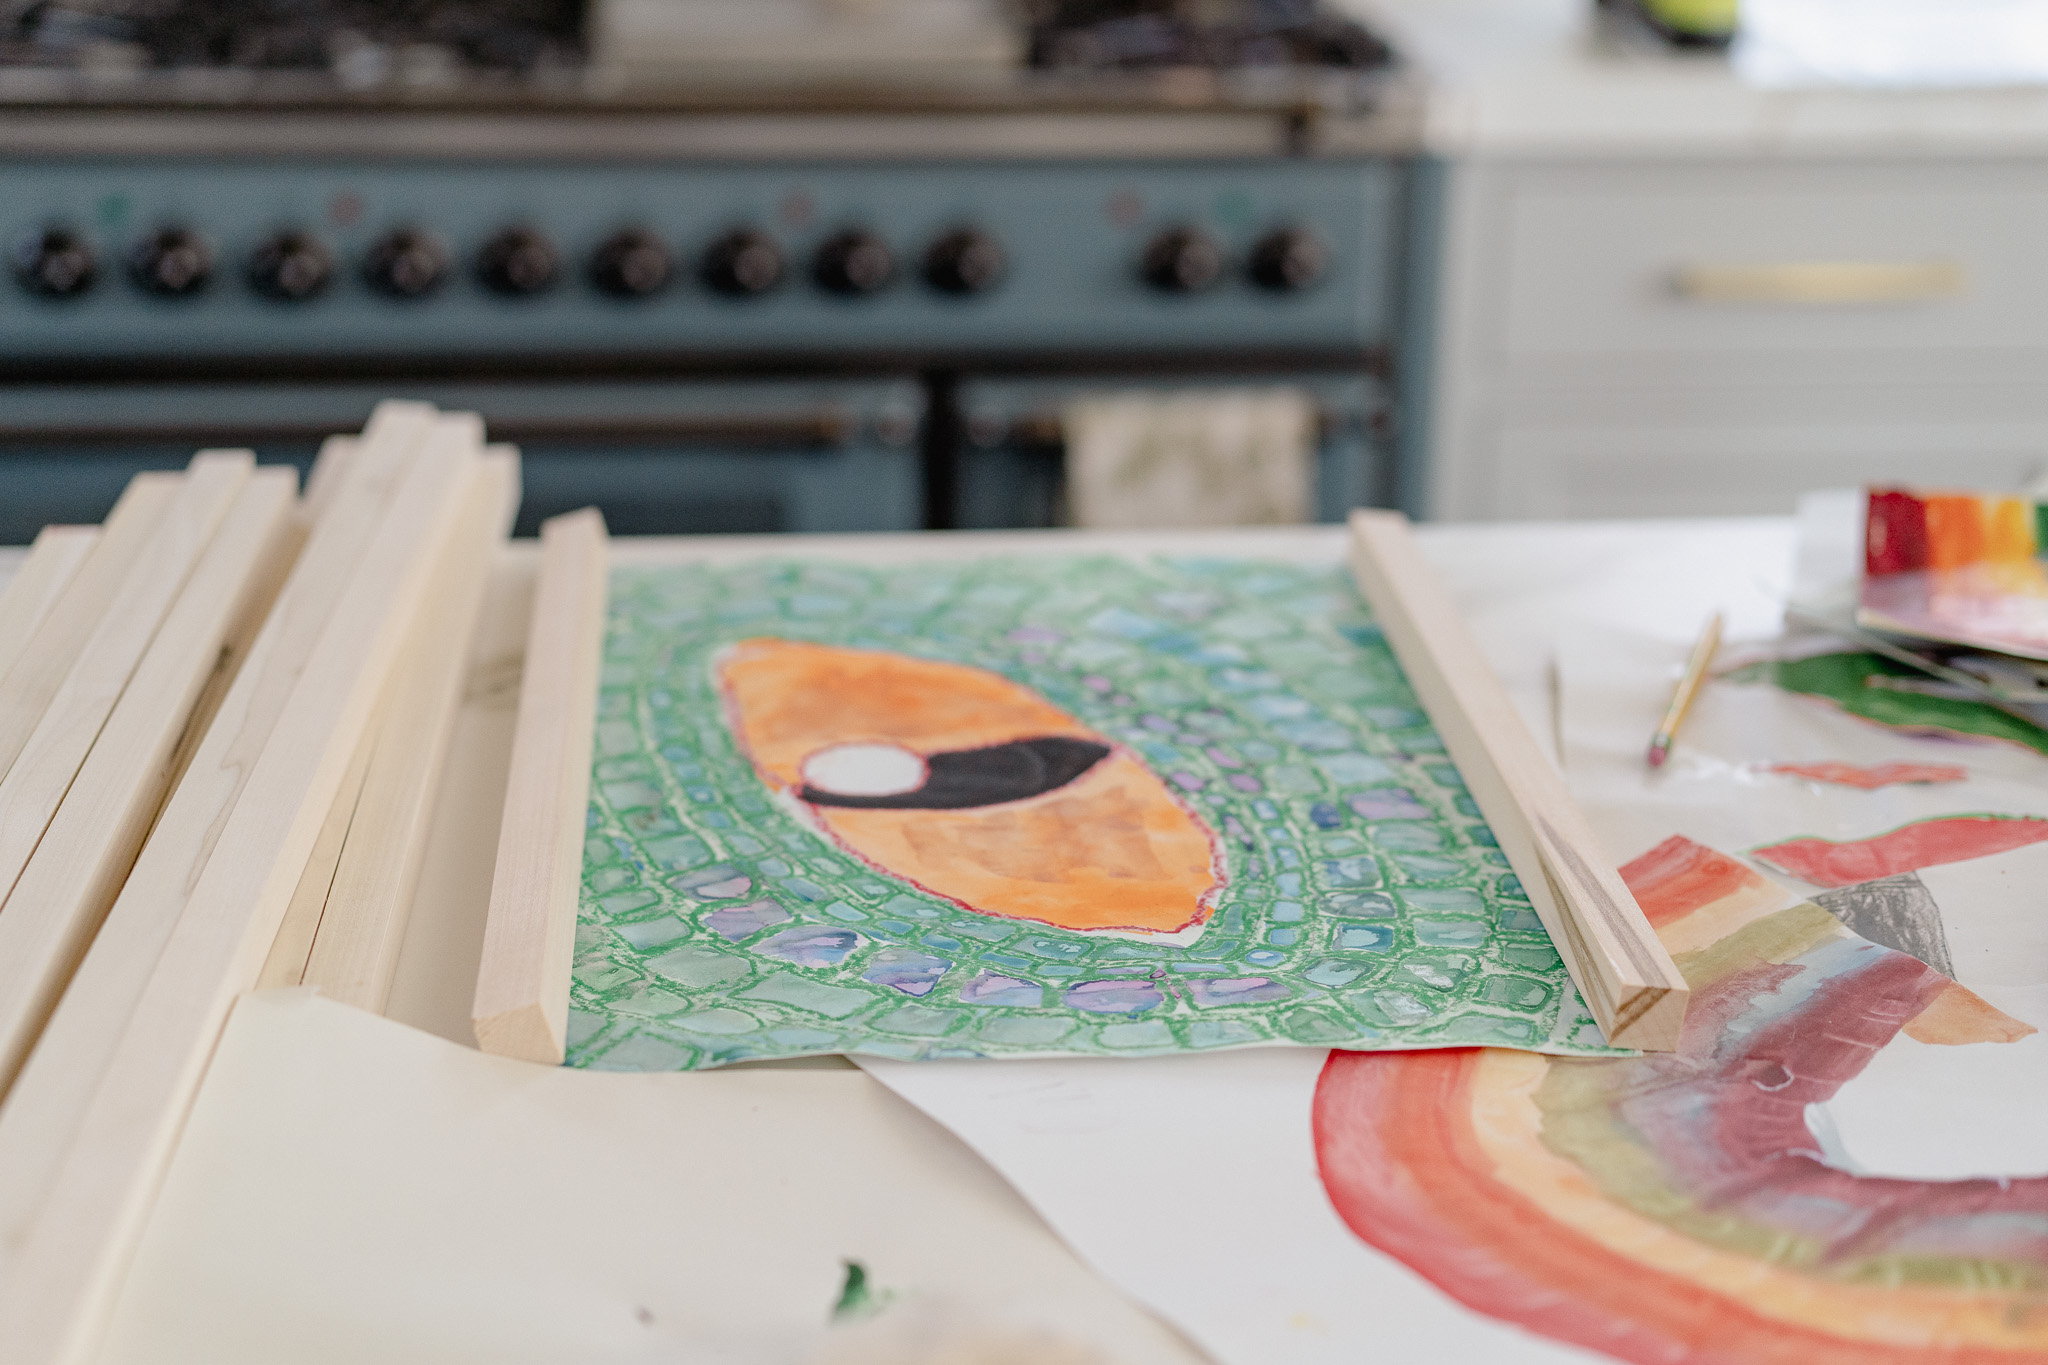
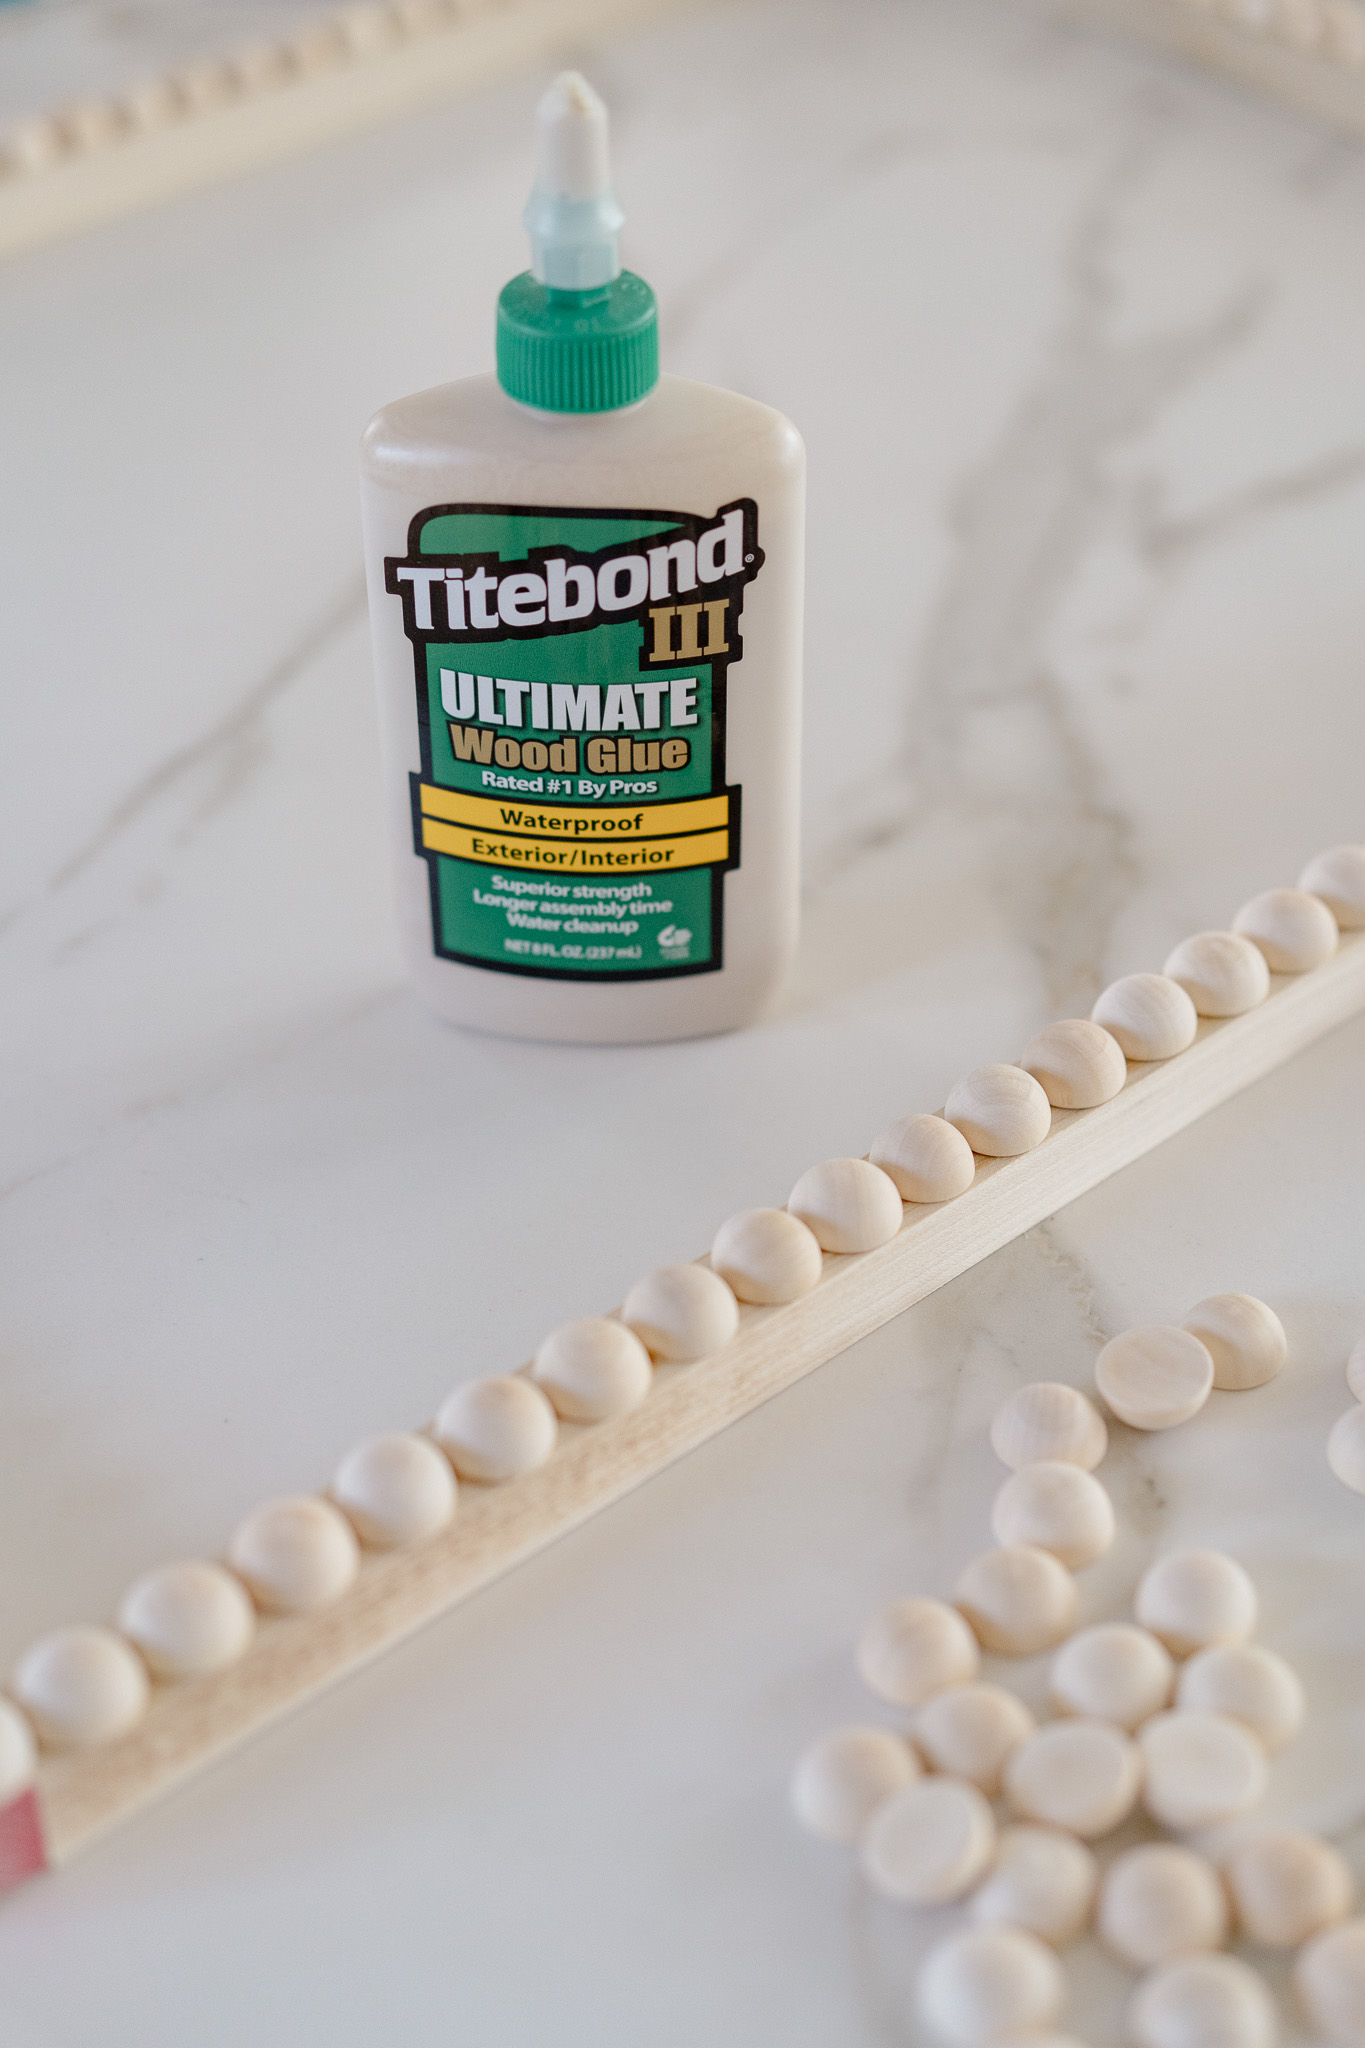
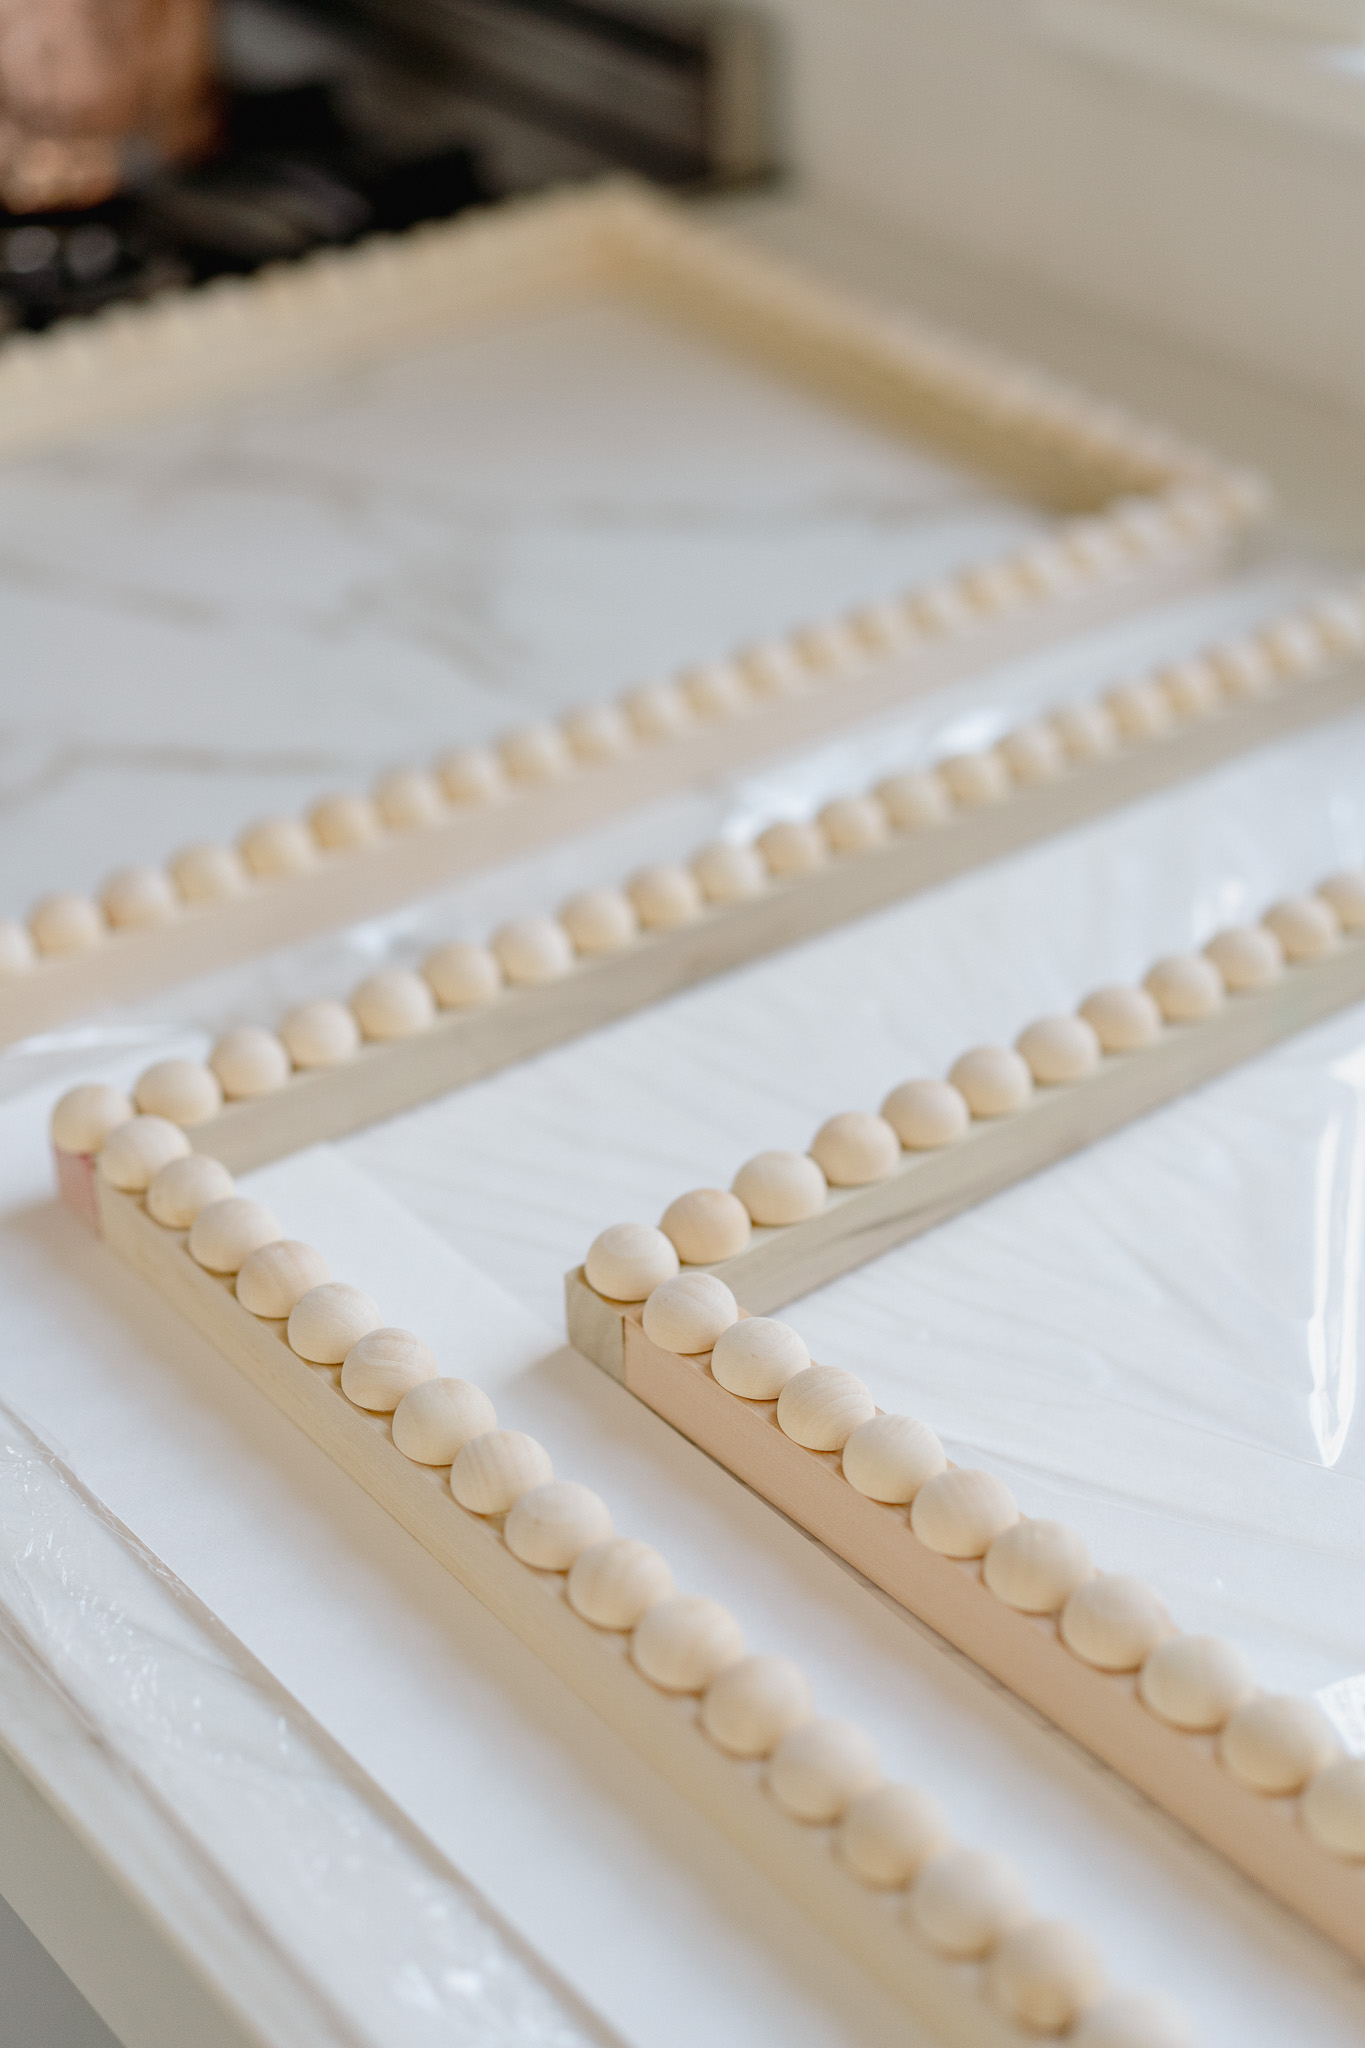
We used straight cuts (because it is easier and you don’t see the top with the beads) but traditionally you do 45 degree miter cut on the ends to make a frame. Matt used his table saw. Using this wood glue, we glued the frame together. Matt then used his clamps to hold it tight while it dried and he popped in a small finishing nail with the nail gun. The glue dries fairly quickly and I got to work using the same wood glue to put on the beads.

It might be worth your time to put an entire row of the 20mm half wood beads onto the frame first before applying glue. I found I needed to shift them, either super tight together or with a tiny bit of space in between in order to get full coverage down a row. The glue dries quickly so if you’ve put the glue down first and then put the beads on, by the time you get to the end and realize you need to push them all a little bit to fit the last one on, the glue is already dry. Knowing how many you need before you put the glue down solves this problem but is more work. The wood glue is impressive stuff!
Let everything dry and then paint them. You could use spray paint or a paint gun but I found a standard brush worked great to get into all the crevices. It took a few coats of paint but I didn’t even spray on a clear shiny coat like I had expected I would. I used leftover paint (SW Carriage Door) to match the Toy trunk. It’s darker in person than it is showing up in these pictures.


I used scotch tape to tape the art onto the back of the frames and used four command strips each to hang the pictures on the wall. I started using my husband’s staple gun to secure the art on the back of the frames but quickly ran out of staples and gave up. I’m really happy with how these inexpensive, DIY Bobbin Frames turned out and hope it inspires you to make some! Our playroom is a work in progress at the moment but I am loving the new wallpaper on the ceiling and the scalloped trim which still needs to be chalked and nail holes filled.

You are under no obligation to use any of the links to buy product on this blog but doing so may give me a small commission which I use to keep this blog up and running ad-free. As a stay-at-home momma, even small commissions go a long ways. Thank you for supporting creativity in an intentionally ad-free space!

 comment share